现在各种翻墙手段层出不穷,pptp, l2tp, sstp, openvpn, shadowsocks, ssh-tunnel, 能够满足各种需要。配置难度大概是l2tp > openvpn > pptp > shadowsocks > ssh-tunnel,而sstp一般只能在windows server上才能配置,使用得较少,因此也被GFW干扰得较少。其他几种VPN在国内不同地区受干扰的程度不同,因此一种方式不行的话可以换另一种方式翻墙。
鉴于用StrongSwan之类的工具搭建l2tp vpn实在是繁琐,我也没去尝试,这里推荐一款非常好用的vpn部署工具——SoftEther。此软件是日本筑波大学开发的,他们还有个PacketiX的VPN服务。SoftEther支持部署l2tp/openvpn/sstp的vpn server,还支持部署它自身开发的一套基于SSL的VPN,防火墙穿透性能优秀。同时还提供了GUI的配置工具及vpn client,可谓vpn中的瑞士军刀了。
本文则着重叙述如何利用SoftEther搭建l2tp server,相比其他软件,步骤简单了很多。有一点Linux知识的人参照教程可以在20分钟之内完成部署。
本文主要参考自:http://blog.lincoln.hk/blog/2013/03/19/softether-on-vps/
作业环境: OAH openvz, CentOS 6 32bit
下述操作全部以root权限执行。
一、准备工作
首先要下载SoftEther服务器端。没有直达链接,需要去其官网根据自己操作系统类型选择相应软件包,例如:
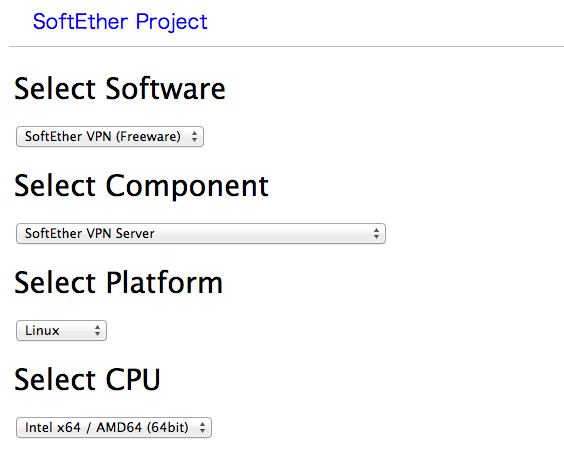
然后复制下方生成的url,在VPS上用wget下载即可。
接着准备编译环境:
yum groupinstall "Development Tools"
二、编译和配置SoftEther/dnsmasq
首先配置dnsmasq,否则Local Bridge方式下的SoftEther会无法分配客户端IP。
安装dnsmasq:
yum install dnsmasq
chkconfig dnsmasq on
配置dnsmasq,在/etc/dnsmasq.conf的最末尾添加下列选项:
interface=tap_soft
dhcp-range=tap_soft,192.168.7.50,192.168.7.60,12h
dhcp-option=tap_soft,3,192.168.7.1
注意这里的”soft”,需要和后面的VPN配置里指定的名称一致。
如果还没有开启ipv4 forwarding,修改/etc/sysctl.conf里的这一句:
net.ipv4.ip_forward = 1
然后执行sysctl -p应用修改。
接着给iptables加一条转发规则:
iptables -t nat -A POSTROUTING -s 192.168.7.0/24 -j SNAT --to-source xxx.xxx.xxx.xxx
service iptables save
其中xxx.xxx.xxx.xxx是你的VPS的IP。
做好了前期工作,接着将下载下来的SoftEther文件解压缩后编译:
tar xf softether-vpnserver-XXXXX.tar.gz
chmod 755 vpnserver
cd vpnserver
make
编译过程中需要按三次1,用于阅读许可协议并同意。正常完成后,继续下面步骤。如报错,根据错误信息查看少安装了哪些软件。
cd ..
mv vpnserver /usr/local
cd /usr/local/vpnserver/
chmod 600 *
chmod 700 vpncmd
chmod 700 vpnserver
vim /etc/init.d/vpnserver
然后在编辑器里,粘贴如下配置:
#!/bin/sh
### BEGIN INIT INFO
# Provides:          vpnserver
# Required-Start:    $remote_fs $syslog
# Required-Stop:     $remote_fs $syslog
# Default-Start:     2 3 4 5
# Default-Stop:      0 1 6
# Short-Description: Start daemon at boot time
# Description:       Enable Softether by daemon.
### END INIT INFO
DAEMON=/usr/local/vpnserver/vpnserver
LOCK=/var/lock/subsys/vpnserver
TAP_ADDR=192.168.7.1

test -x $DAEMON || exit 0
case "$1" in
start)
$DAEMON start
touch $LOCK
sleep 1
/sbin/ifconfig tap_soft $TAP_ADDR
;;
stop)
$DAEMON stop
rm $LOCK
;;
restart)
$DAEMON stop
sleep 3
$DAEMON start
sleep 1
/sbin/ifconfig tap_soft $TAP_ADDR
;;
*)
echo "Usage: $0 {start|stop|restart}"
exit 1
esac
exit 0
保存并退出编辑器后,继续后续配置:
chmod 755 /etc/init.d/vpnserver
#下面这行可能会报错提示目录已存在,可无视
mkdir /var/lock/subsys
chkconfig --add vpnserver
接着启动SoftEther:
/etc/init.d/vpnserver start
确认SoftEther运行状态:
cd /usr/local/vpnserver/
./vpncmd
3
check
返回结果都是”Pass”就代表server端启动正常。
接着设置管理员密码,用于后面的远程登录管理:
./vpncmd
1
127.0.0.1:5555
这一步直接回车,使用默认值
#出现"VPN Server>"提示符后:
ServerPasswordSet
上面的5555换成443, 992都可以。
至此,SoftEther的VPS端配置完毕,接着在windows下使用SoftEther Server Manager进行具体VPN配置。
三、VPN配置
依然去SoftEther官网下载SoftEther VPN Server Manager:
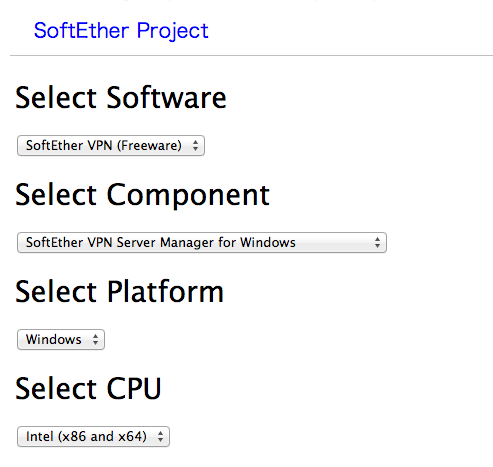
安装后启动,点击New Setting,填入VPS的IP和端口(443, 992或5555),在接着弹出的窗口里输入上一步指定的密码。

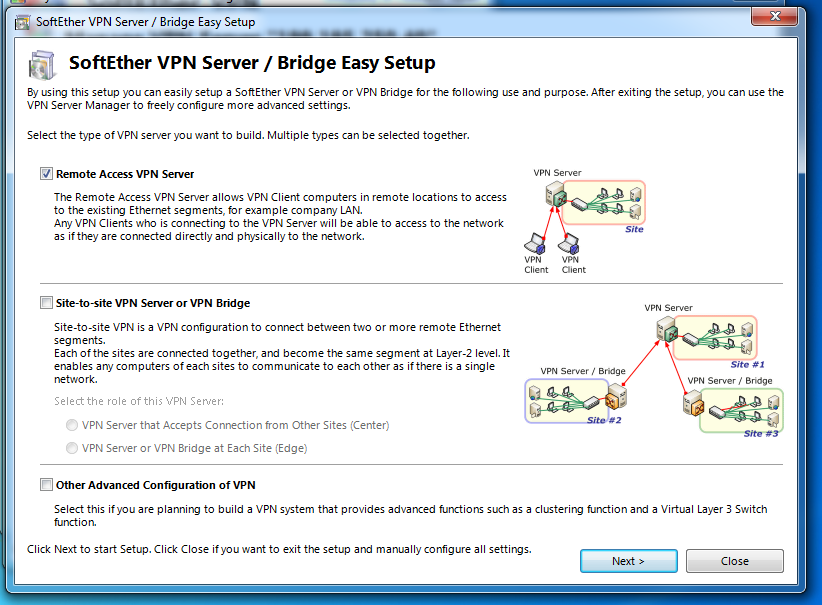
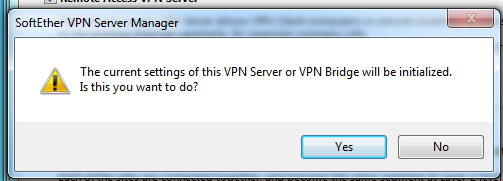
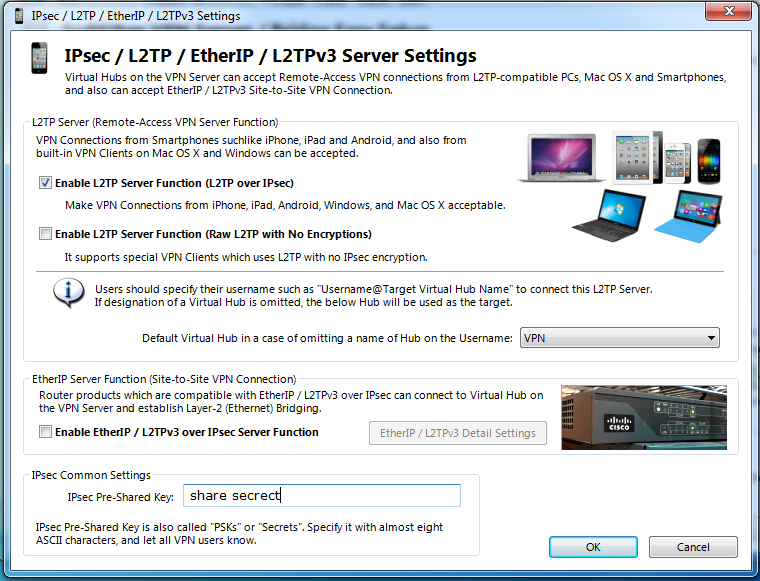
顺利登入后,会弹出Easy Setup界面,按照图示选择相应选项:

选上“Enable L2TP Server Function”,并且输入IPSec Pre-Shared Key(自己随便指定)。
接下来的窗口里禁止Azure VPN:

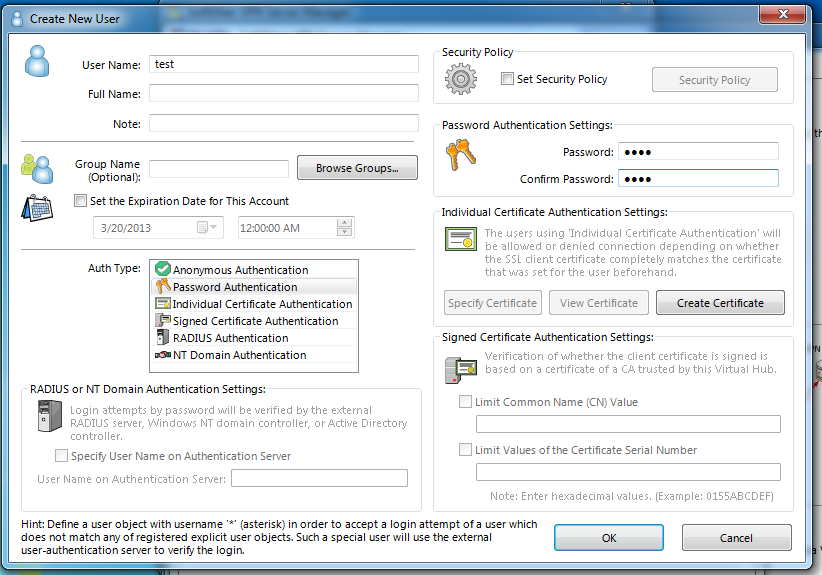
然后就是创建用户:
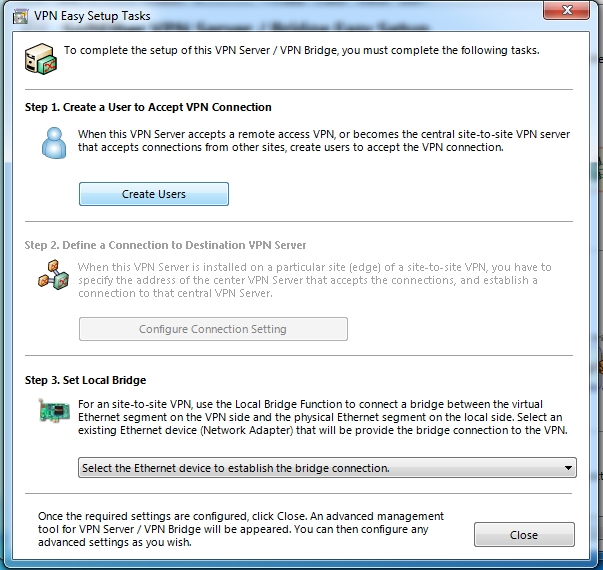
只需要用户名和密码即可,其他可以不用填:
在Manage VPN Server窗口里,点击”Local Bridge Setting”:

在弹出窗口中做如下配置。注意这里的”VPN”、”soft”都已在前面指定,需要和前面的配置保持一致:

配置完成后,保存退出。这时候在VPS里执行下述命令,应该能看到”tap_soft”这个interface的数据:
ifconfig tap_soft
至此配置全部完成,重新启动SoftEther和dnsmasq:
/etc/init.d/vpnserver restart
/etc/init.d/dnsmasq restart
接着就是在你的客户端创建l2tp连接,试试速度啦!l2tp的客户端配置比较简单,只比pptp多输入一个Pre-Shared Key,这里不再赘述。
本文为悠然居(https://wordpress.youran.me/)的原创文章,转载请注明出处!
最近我也一直在路由和vps windows上部署softether服务端。用起来还可以,至少能用。不过广东电信和铁通把openvpn禁止得非常厉害。l2tp连起来的效果似乎也比PPTP更糟。所以发此帖我没连上自己的softether,而是连上香港自己在ddwrt搭建的pptp server。
@ntgeralt
据说ikev2效果不错。我现在是在merlin上用ss